My life has a superb cast but I can't figure out the plot.
~ Ashleigh Brilliant


Showing posts with label new house. Show all posts

Monday, January 14, 2013

Holiday House Tour, Part 2 (the kitchen)

It feels like I posted Part 1 of our new house tour a year ago! ;-) Sorry for the delay on Part 2; I took these photos in December while the house was decorated and had hoped to post it by New Year's weekend, but things conspired to send my good intentions down the loo, and this post took even longer to put together than the last one despite being primarily limited to just one room! But it is, after all, the heart of the home so far be it from me to be a total slacker with this post. 

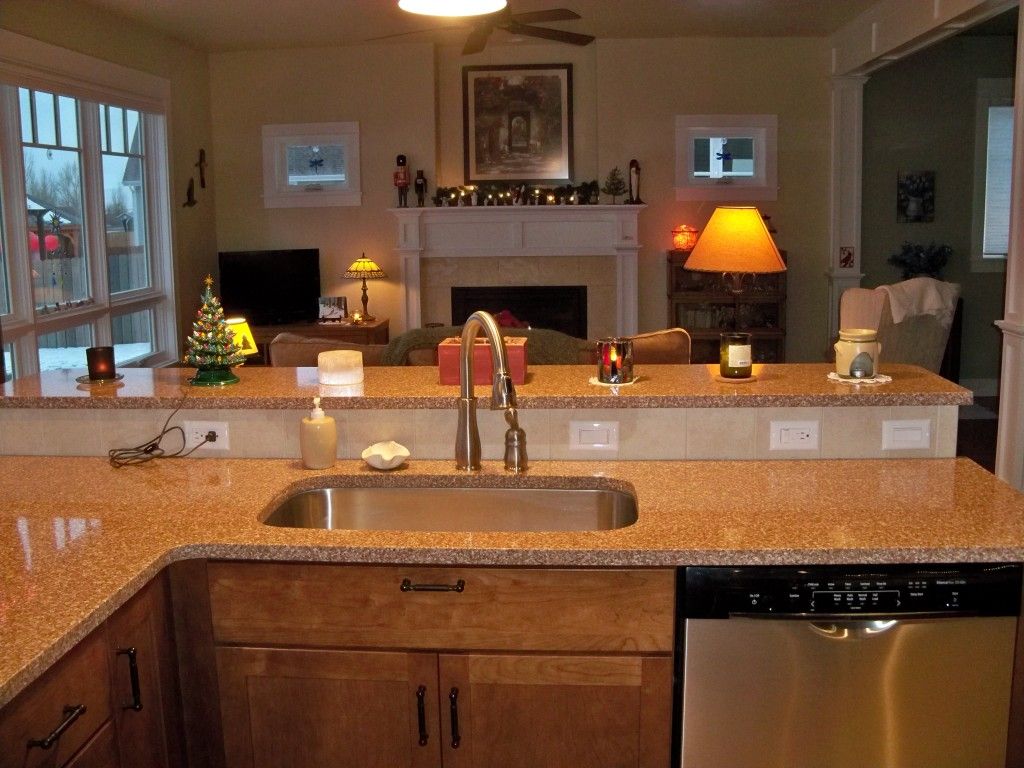
So, picking up pretty much where we left off, here are a couple of views from the kitchen into the living room/dining room area. We redesigned the kitchen island, in the foreground, from the small, odd and inefficient "space module" island in the original floor plan...
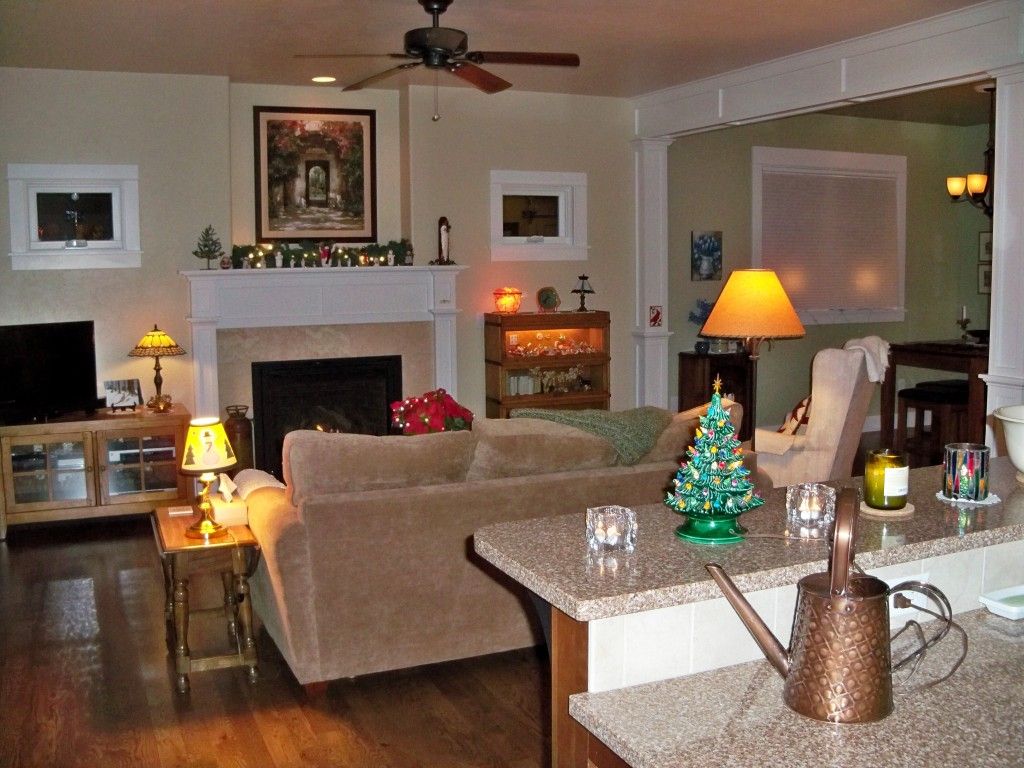

See Part 1 for info/links for the paint colors, hardwood floors, fireplace, art piece, windows, etc. As with that post, I'm sharing links to some of the products used in our house, and this time some links to a few favorite "accessories" as well! :-) (As I mentioned in part 1, we shopped around and hit a lot of great sales, special offers, or got items through our builder and/or subs, so the prices currently listed on these web sites are usually far higher than what we paid). 


The drawer beneath the sink is a tip-out, stainless-lined storage tray. I'd never had one before and I LOVE it! It's so nice to have sponges, etc off the counter and out of sight.

The dishwasher is so quiet, I usually have to look at the light panel to know if it's running!

Faucet: Delta "Leland" Single Handle Water Efficient Pull-Down
Dishwasher: Bosch Ascenta Series in stainless steel
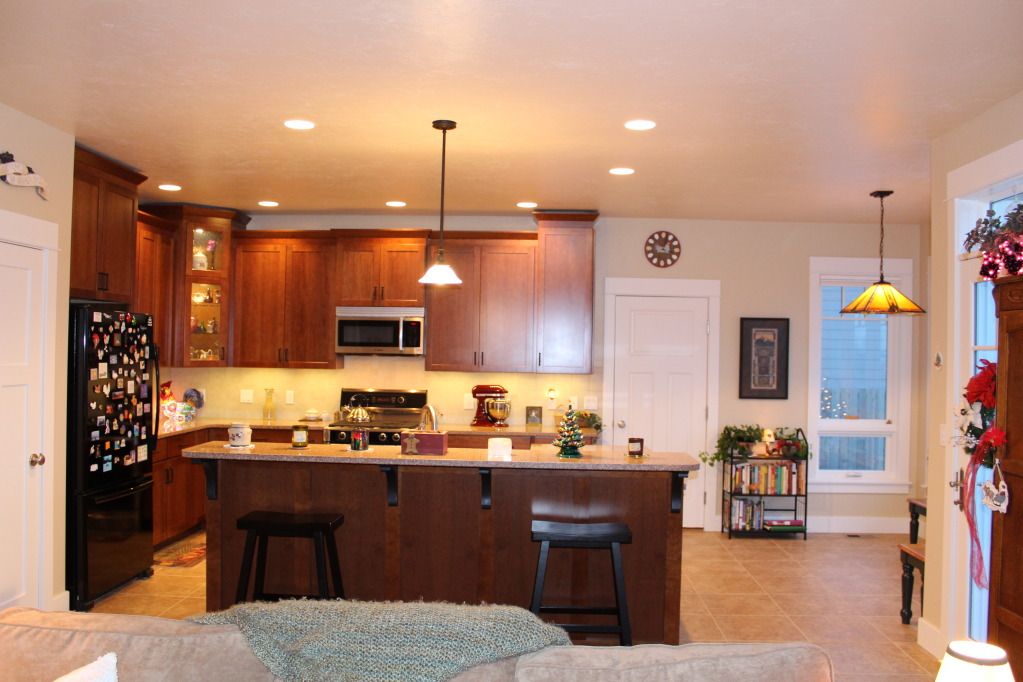
This photo, though not my favorite since it looks like I took it on the deck of a listing ship, does the best job of showing the majority of the kitchen and nook. The pantry door is on the left, the door to the garage (which the floor plan lacked and we added) is straight ahead, and the French door to the patio on the right. The garage door leads to the "3rd car/storage area" portion of the garage, which in our family's case is our dogs' heated kennel with a dog door to the back yard.

A better, though smaller, photo of the same area...
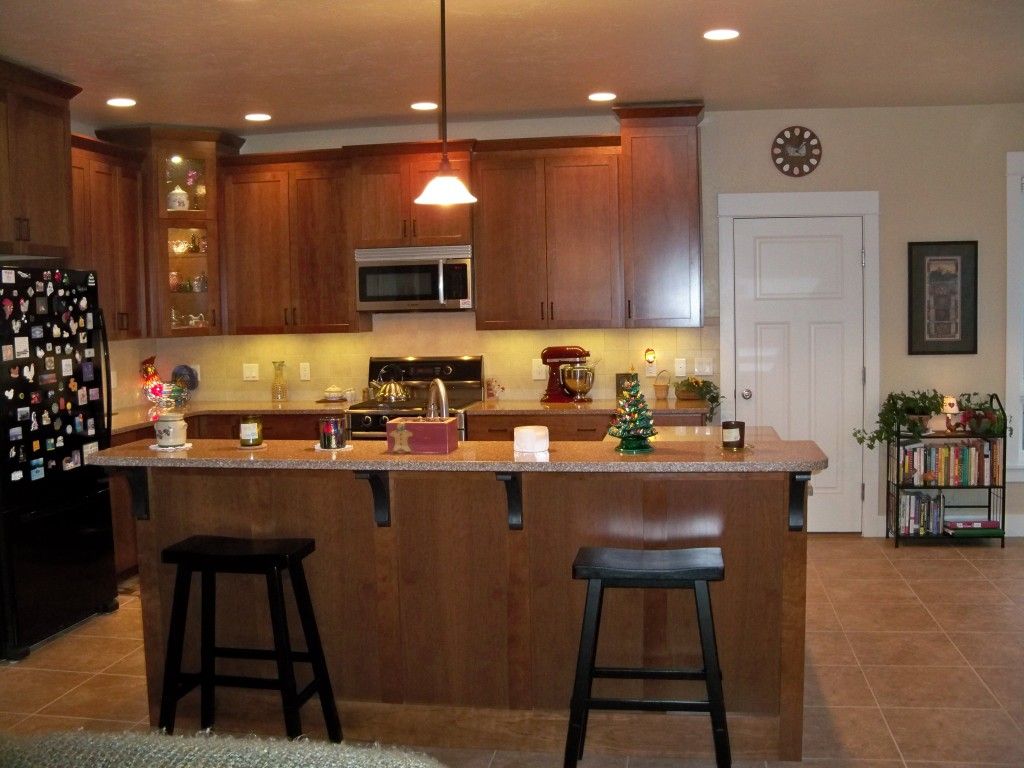
Kitchen Island pendant light: Royce "Essex" mini pendant from Lighting Direct
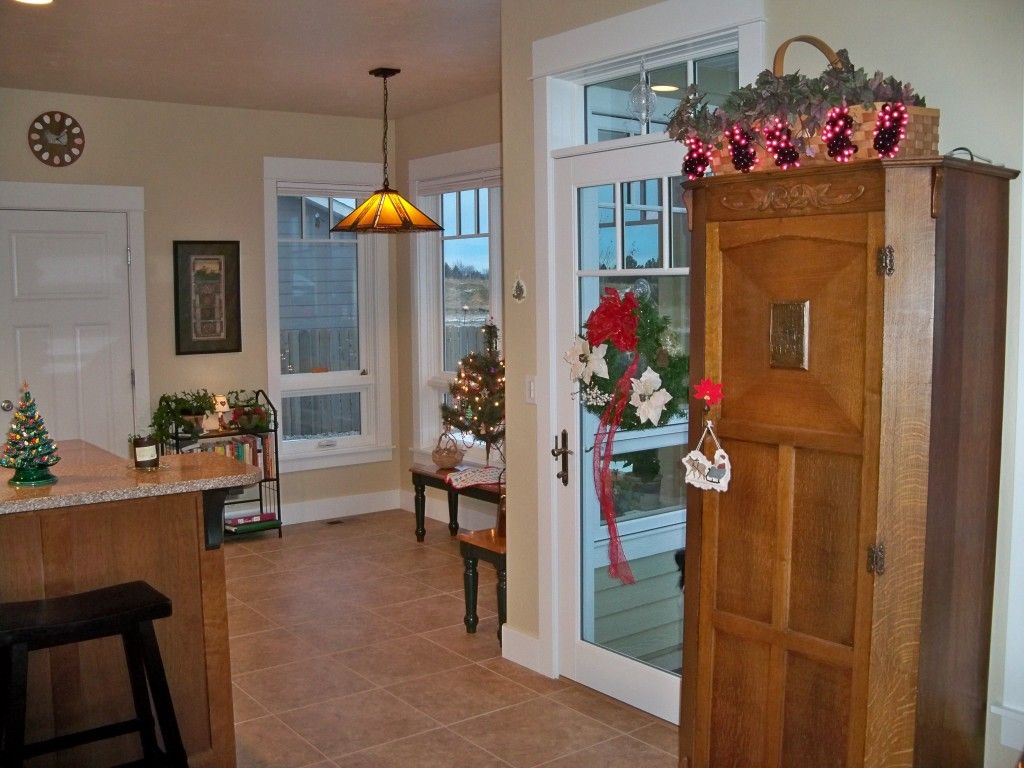
You can just see Willow peeking through the patio door. The dogs love to peer at us, Snoopy Vulture-like, through that door and low awning windows when they're outside. :-)

The oak wardrobe is an antique from England, purchased from an antique dealer in Dallas right after we got married. Moving it is always a bit traumatic, and it always gets pride of place in our home. Here's a closeup of the basket of grape lights, which some of you may remember I bought as a housewarming present to myself when we sold our house and moved into Dragonfly Cottage. :-)

Wall color: Sherwin Williams "Kilim Beige" SW-6106
Ceiling Color: "Divine White" SW-6105
Trim color: "Pure White" SW-7005

We were able to get this tile less expensively at a local flooring store than at Home Depot. We used the same tile in our front entry, but in the 12x12" size.

We chose epoxy grout for all the tiled surfaces in the house except the kitchen backsplash and are very glad we went to the additional expense, especially in the kitchen. We just had no luck sealing and/or cleaning regular grout in our old house. Epoxy grout needs no sealing and wipes clean with water - even when it's taken a hit with pomegranate juice! :-) And since we had an excellent professional install all the tile, he had no trouble with the challenges of working with epoxy.


We had some difficulty choosing a kitchen countertop surface that worked with our budget and our criteria for looks, durability and ease of maintenance, sustainability, and future home resale. BW really liked soapstone (far too expensive, and I didn't want gray countertops), while my first choice was recycled glass - I had my heart set on Vetrazzo - but that proved difficult to find in our area, and cost-prohibitive when we finally located some in Montana. After researching and eliminating other possibilities, it came down to a choice between granite and quartz. After studying several articles and helpful tools, including these...


...and shopping around at our local building supply/design stores and comparing countertop samples to our chosen cabinet colors, we'd pretty much decided on quartz, preferring the look, available colors and ease of maintenance. Then the decision was virtually made for us when we learned that one of our two top quartz choices had been substantially marked down due to "inventory overstock" at one of the local countertop fabricators. The fabricator we'd chosen (he was far less expensive and came highly recommended by our builder) was willing to match the sale price, and the deal was done. We're happy with our choice with one exception: quartz slabs are smaller than most granite slabs, so we have an extra seam. And though our installer did a good job (well, not at first - we had him come back and vastly improve one of them), seams still show, especially when the sunlight hits them. I don't know that we would have made a different decision knowing this, but the deed is done, we love the look and ease of the quartz - and we more or less came within our builder's paltry countertop allowance for the entire house. (We did end up with granite in the guest bath when we got a killer deal on a beautiful remnant that went perfectly with our chosen tile and vanity colors!)


Here's a closeup of the plaque over the pantry door. Can't remember where we bought it years ago, but have seen them for sale in various places since.

Our kitchen cabinets were the first thing we chose, figuring we could more easily match flooring tile and countertops to the cabinets than vice versa. Given that this was one of the bigger expenses in the home, we once again did our homework first:


These were helpful, though once again our budget, product availability, looks and features were also key to our decision. And once again we shopped around - at Home Depot and two local kitchen design places, one of which dropped the ball and never bothered to give us a bid. In the end, Home Depot's prices and features on our choice of Kraftmaid cherry cabinets could not be beat (and then we ended up lucking into a great sale on top of the already better pricing and free features!) And we adored our designer, Rachel, who moved to Virginia when her fiance was transferred there just as our project finished! We were incredibly lucky to work with her, and she was as delightful as she was skilled. Kitchen design would have been pretty stressful otherwise.

The cabinet color and style were surprisingly easy choices since we knew we wanted a warm, rich color (we went with cherry with a stain color called "Chocolate," so I love to tell people I have a kitchen made with chocolate covered cherry!), and a simple Shaker style to go with our Craftsman home. 

Then the hard part started.* Veneer vs solid center panels (the awesome sale was for the veneer, so that decision was made for us), glaze (no, it costs 10-15% more and I don't like how it looks on Shaker style doors), drawer fronts (we went with slab, which we preferred and was standard so didn't cost extra at the time, but now it does), soft-close (oh yeah, on every cabinet door and drawer in this house! It was one of the free features with these cabinets), full extension drawers (highly recommended!), the Lazy Susan style (we chose an upgrade; "Easy Reach" with wood shelves, no center pole), full or partial overlay (ours our full), how many roll-outs (we have four, including two huge ones beside the range where we store our skillets, pots & pans and casserole dishes - and they're so handy we still wish we had a couple more... but there's always the after-market!), all the other available features like cutlery trays (we passed on most of them), and of course the cabinet sizing and placement. Rachel did a great job helping us with placement (and was invaluable in helping us redesign our island), and we love the layout of our kitchen, which is very efficient and user-friendly. Where we goofed a bit was in the cabinet height. We wanted the end and corner cabinets to reach the 9' ceiling (for complicated carpentry reasons, they don't quite reach it) and the others to be a foot shorter so I could put crocks and baskets up there. We even had the electrician install a couple of outlets above the cabinets so I could put little white lights among the greenery in the baskets. What we failed to take into account was the 4" tall crown molding - there'd be room for my baskets up there, but only if I could fold them flat first to squeeze them between the molding and the ceiling! Oh well, now we're thinking of putting LED rope lights and artificial grapevines up there instead - just haven't had time to make it happen yet.

*This is handy stuff to know when shopping for kitchen cabinets!

Kitchen cabinets: Kraftmaid "Layton" in Cherry with "Chocolate" stain, purchased through Home Depot.
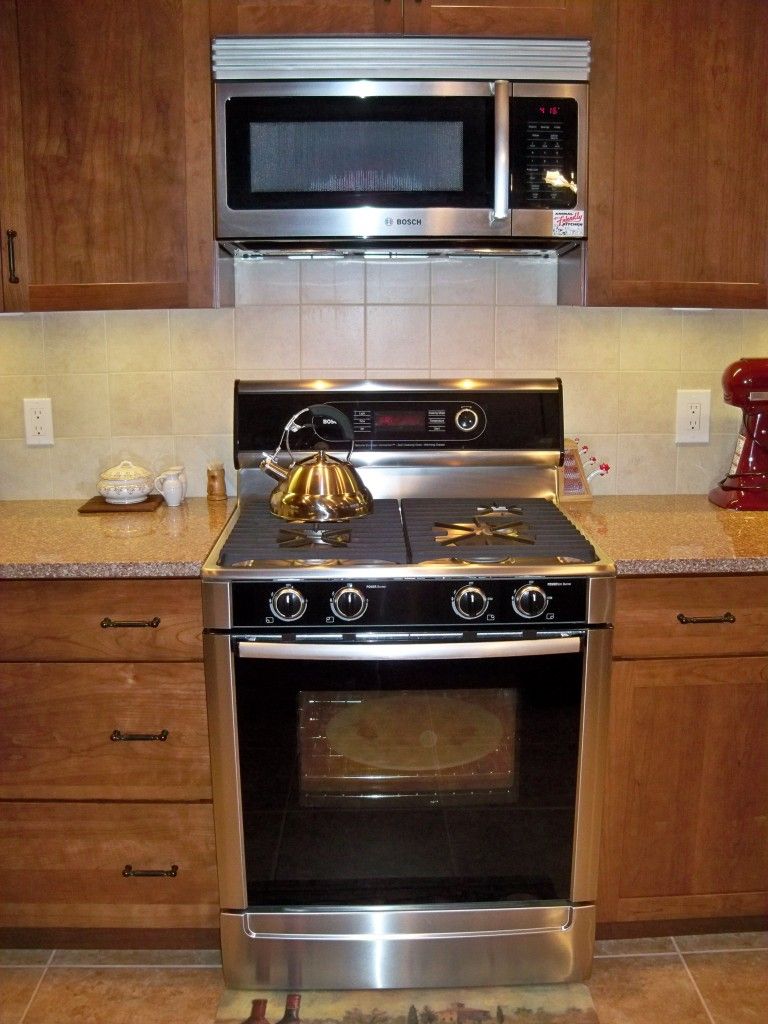
See our pizza stone inside? :-) Can't live without that baby!
(I don't recall the brand of ours, but it's similar to this one)

We were also somewhat challenged by our decision on appliance colors. I'm fond of white appliances and love the fun, playful colors offered by companies like Big Chill, Smeg and Aga - but none of those were going to work in this Arts & Crafts, Tuscan-themed, earthy kitchen (or within our budget!) What would work was black or stainless steel. Not a big fan of stainless steel - I think it's an overdone trend that may be close to playing out, especially given the extra maintenance required to keep smudges at bay, and the "commercial kitchen" look is really not my style. But it's still considered high-end, and around here at least (Wyoming is usually about a decade behind any current fashion), it's still very popular. So again, with resale in mind, we felt compelled to consider it. I refused, however, to have a stainless fridge. Polishing the one in Dragonfly Cottage was a royal pain in the arse, but the real deal killer was the fact my magnet collection wouldn't stick to it! :-) So we chose a black fridge... and, hedging our bets, a combination of black and stainless for our other appliances. Again, we hit a great sale - the President's Day sale at Sears combined with additional savings on Bosch appliances. We wanted to get the microwave in black, but conditions of the sale required we buy the stainless one. I actually like our stainless dishwasher, which matches our sink and faucet nicely, but I really love our range. This was one of our splurges - we wanted dual fuel and were willing to pay the extra $ for it, and have no regrets. We love cooking on gas burners and having the consistent results and zero hassle of an electric oven. This range has been awesome, and we like its looks, too! (The microwave is just okay).

Microwave: Bosch Microhood


We ordered the corner cabinet doors without glass, since it was substantially cheaper to have our local glass place cut pieces of glass to fit them. We chose seeded glass for a vintage look you can easily see through. 

The backsplash appears to have a greenish tint to it on my computer monitor, but in real life it's a very neutral off-white that matches some of the quartz in the countertop. Nothing fancy, but we like the clean and simple look.

Here's a closeup of the stained glass rooster light; again, I can't remember where we bought it years ago, and unlike the "Vive Bene" plaque, I've never seen one exactly like it since!

LED Under Cabinet Lighting: Model UCB Double Row LED from Broadwax (top item in third section from top)
LED puck lights in corner cabinet: Maxim Light Disc Starter Kit from Lighting Direct

This guide was a very handy resource when buying LED lights, especially since we prefer "warm" light temperatures...
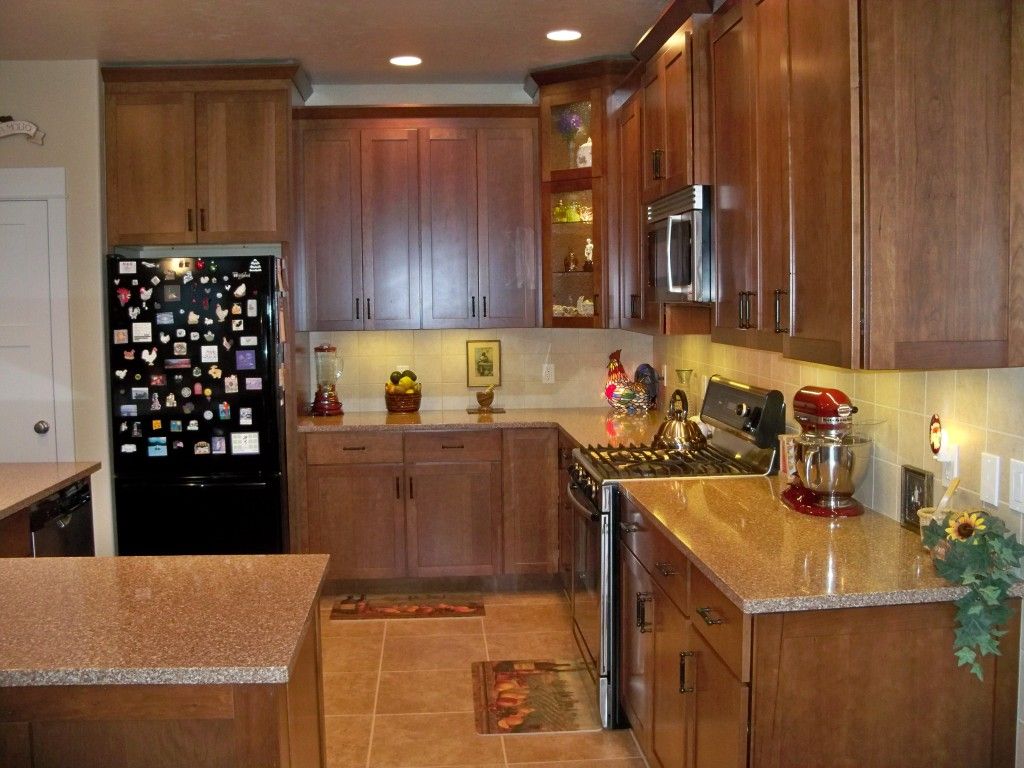

The kitchen viewed from the nook

Since there are just the two of us and we have an additional refrigerator in the garage (the original Jenn-Aire that came with our Big Horn house that we bought in 1991, can you believe that?), we bought a small fridge but had the space for it constructed so that with the easy removal of a spacer trim piece, a larger one can fit there.

Blender: Waring Professional Bar Blender in Chili Pepper Red from Amazon.com (purchased 10 years ago next month and still going strong!)

This photo is payback for Ellie C (aka Elephant's Child!) :-) Not the most focused photo, and the glare from the nook windows or flash is giving me fits - but I have an idea so will keep trying and will replace it if/when I get a better one...
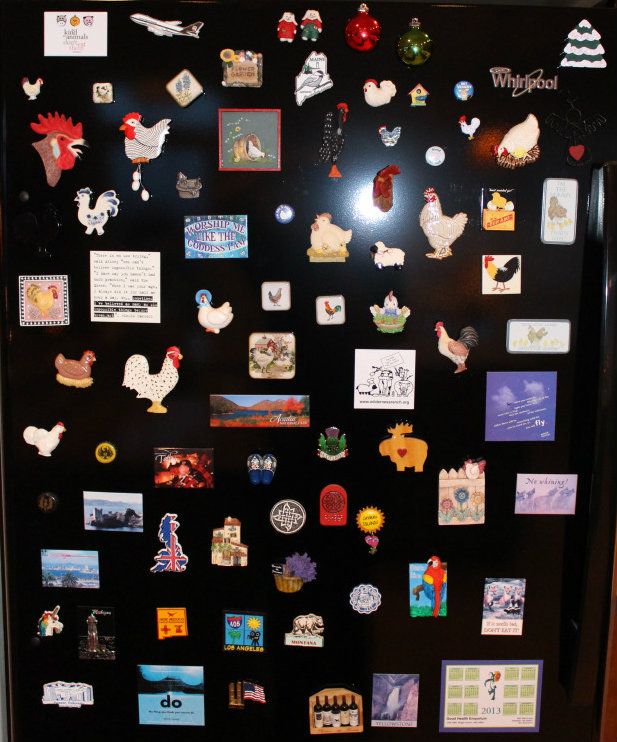
The magnet collection: a big reason our fridge isn't stainless steel! :-)


And here is the nook viewed from the kitchen. The cupboard on the left is one of these 
(only we went with a single, since we have our recycling containers in the garage)

Bookstand: ORE International 3-tier metal book rack from Amazon

Since our pub table is taking the place of a dining room set for now, Willow has commandeered the nook with her bed and water bowl (Tess and Josie love their big garage kennel, but want nothing to do with coming in the house!) The nook is a strategic spot that's perfect for being first in line for handouts of her favorite from-the-kitchen treats: raw red cabbage, broccoli, cauliflower, mushrooms and carrots! 

Spoiled rotten? You betcha! Wouldn't have it any other way. :-)

Dog: One-in-a-million border colllie/collie mix adopted from local shelter. Highly recommended. :-)

These days she's also having to share "her" nook with two enormous house plants that we're babysitting for our next door neighbors while they're on a four month cruise. One of our benches had to go elsewhere to make room. (Now I just hope I don't kill the poor dears - one of them is 30 years old!)

Another photo I've shared before but that feels appropriate to share again here: our nook light. The one light fixture I intend to take with us when we move!...
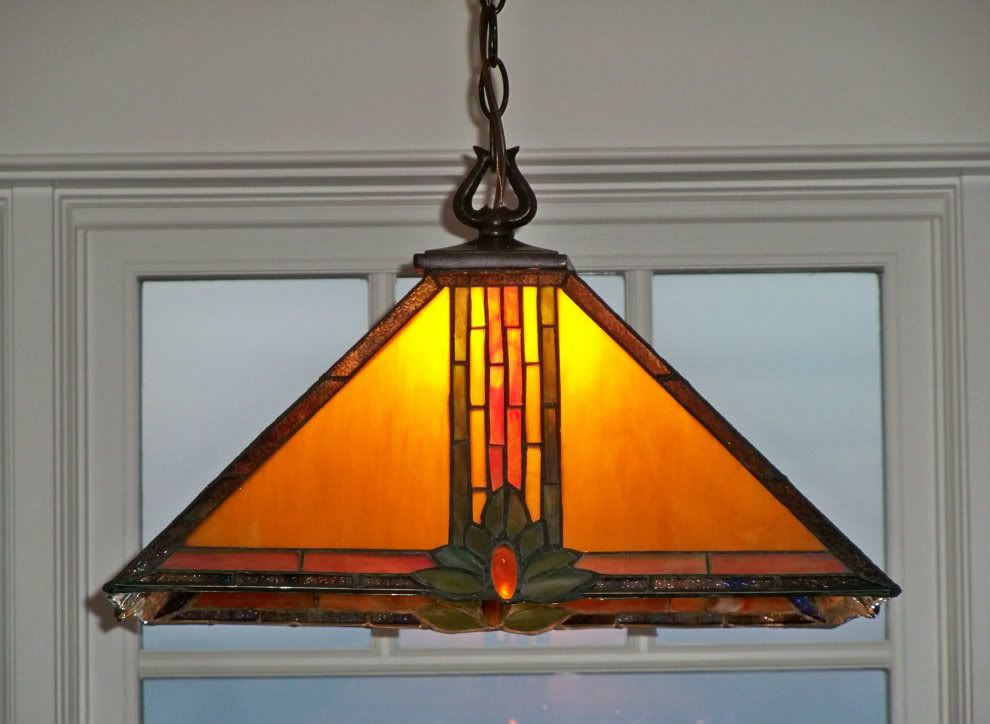
"Maple Jewel" Tiffany-Style Pendant Light from Lighting Direct

The final part of the house tour (it certainly won't be a "holiday" one anymore, unless I don't get around to posting it till next December!) will be the upstairs, but I honestly don't know when that might be. Some of it is still a work in progress.

Thanks for coming over for another tour! As your reward, here's a treat...

Applesauce Ginger Cake with Maple Glaze

Or as we call it, Gingersnap Cake - because duh, it tastes just like gingersnaps!  :-) I made this for the first time this weekend and we devoured it (before I even thought to take photos, but no matter since Susan's pictures are better than any I'd have taken anyway). I made no changes to the recipe, just used sucanat for the sugar (as usual), which was a perfect sweetener for this cake. I intend to make it again soon, and this time will reduce the amount of sucanat to 3/4 cup, since the cake was sweeter than we're used to. But so moist and yummy! Bon appétit! :-) (Update: It's perfect with the sucanat reduced to 3/4 cup!)

Saturday, December 29, 2012

Holiday House Tour (Part 1)


To part 1 of the holiday house tour of our new home!

Most of you have watched it materialize from a vacant lot and ambitious idea to my last construction post, published when it was still a mess just four days before we closed on it and moved in back in late August. It's been an exhausting whirlwind, and I'd be lying if I said we were completely settled, organized, landscaped, decorated and FINISHED. But, it's far enough along for a tour, at least of the downstairs (which is the only part we decorated for the holidays, if you don't count the candles in the upstairs windows!) :-)


Since we built this one from scratch ~ from finding and making changes to the floor plan to researching and choosing every single bloody item, finish, style and color in and on the house, I thought I'd include a few details. I've noticed that several visitors to my blog arrive from Google searches for things like paint colors (that I mentioned on past remodeling/redecorating posts), and we found really helpful info and ideas on blogs and websites that shared details about the various phases of new home construction (two that were especially helpful were Houzz and de Jong Dream House: Building Terms). So I'm sharing some info of our own for anyone out there, now or in the future, who is building, remodeling or decorating and might find it helpful. If you see anything you're curious about that I haven't shared a link to or info about, don't hesitate to ask. I've bookmarked nearly every source and resource from this project! :-) The prices shown on a lot of these linked sites are now in most cases not what we paid - I've noticed a big increase in some of them, and we hit a lot of great sales and got some wonderful deals. It really pays to shop around or to wait for a good sale if time is not of the essence.

To the extent we could afford to, we made the home as energy efficient and sustainable as possible. It's well insulated with R-49 in the attic and spray foam insulation in the walls, has a high efficiency furnace and water heater, cork flooring in two rooms, passive solar and two Solatube tubular skylights, zero VOC paint throughout, only Water Efficient and Energy Star rated appliances and plumbing fixtures, and built-in passive and active radon mitigation.

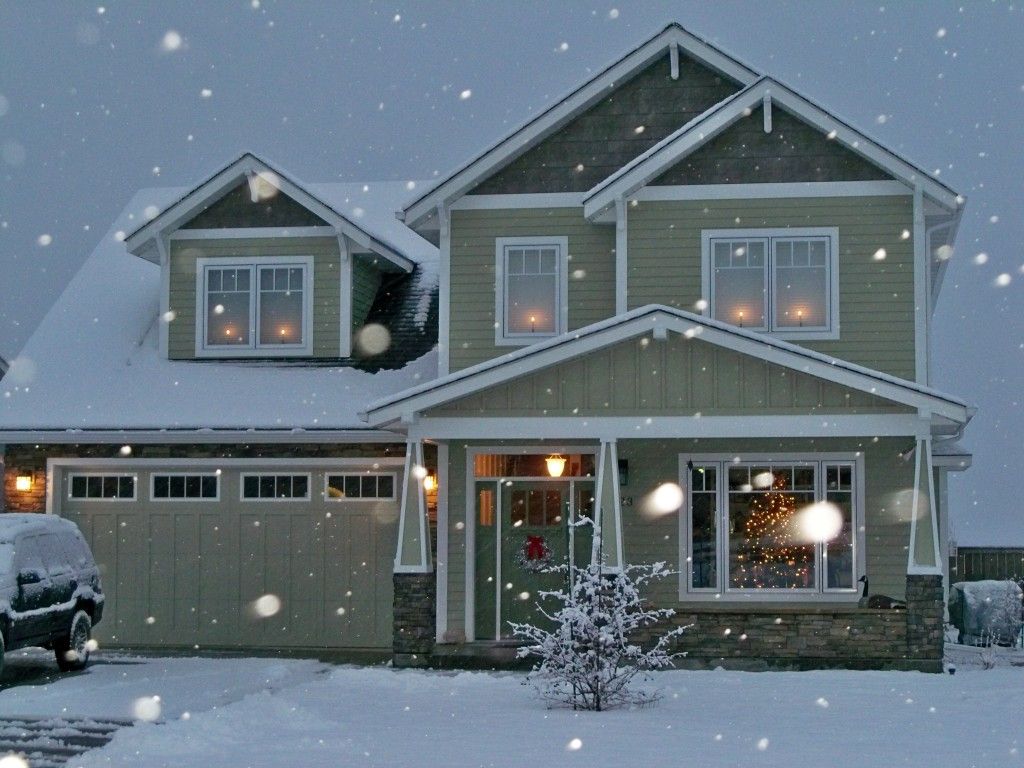
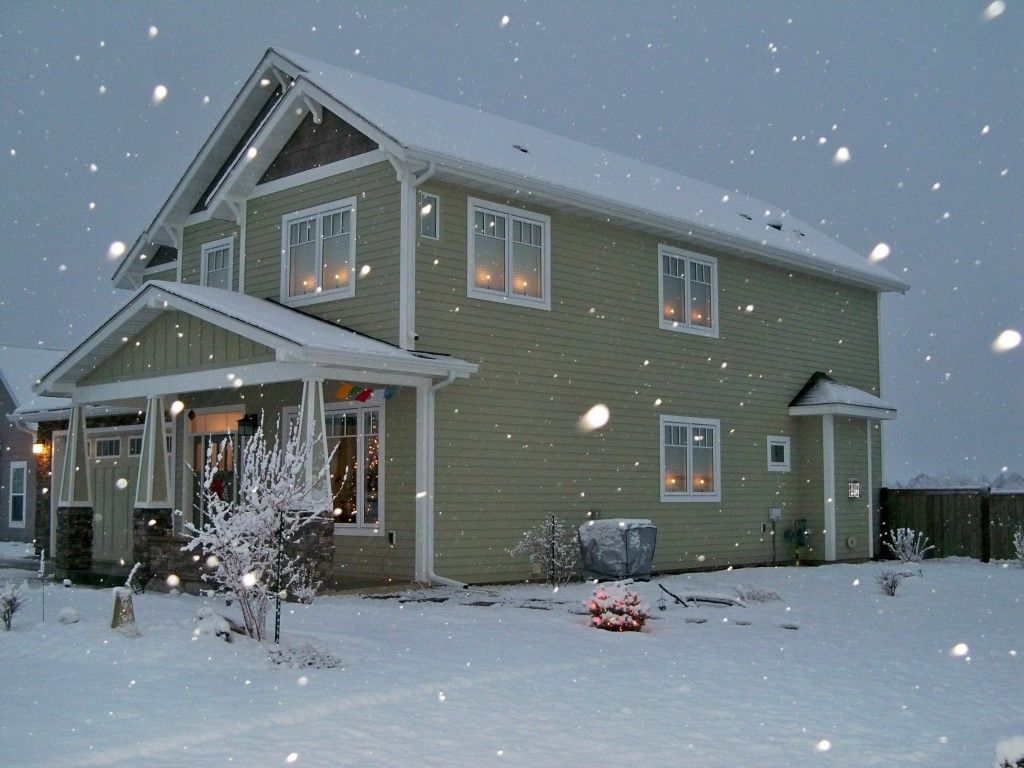
The south side of the house

Siding: LP SmartSide
Exterior Lights: Dolan Designs Craftsman sconces from Lighting Direct
Garage Door: Wayne Dalton 6100 "Brunswick" painted to match the siding,
with "Stockbridge" window style

Siding color: Sherwin Williams "Svelte Sage" SW-6164
Front Door: "Connected Grey" SW-6165
Exterior Trim: "Extra White" SW-7006

But I've kept you standing out in the cold and snow long enough. Come on in!

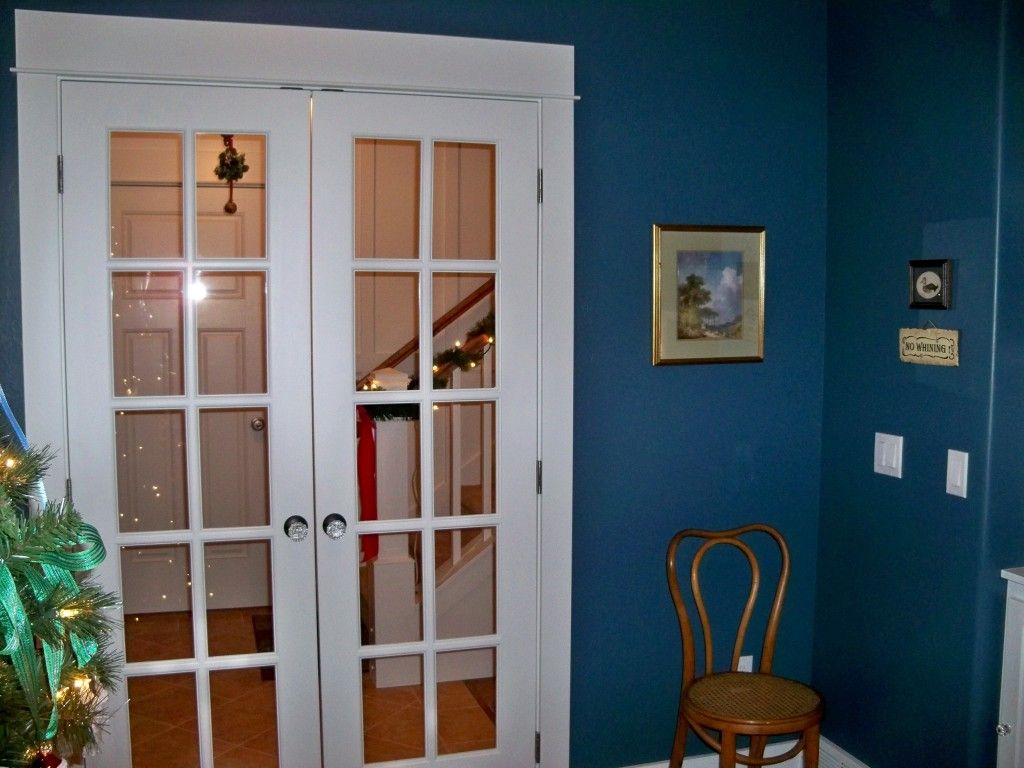
The front entry way and the study's French doors from the staircase.

Hallway wall color: Sherwin Williams "Kilim Beige" SW-6106
Interior trim color throughout house: "Pure White" SW-7005

You've seen a couple of these photos of the study in past posts, but here's a more comprehensive look...

A re-run from my Christmas Eve post, I'm including it because it's the only photo 
of the study that shows the big window, which is one of its best features! 

Wall color: Sherwin Williams "Smoky Blue" SW-7604

The Command Center of the Starship Mehitable Days :-)

As you may remember, I designed this bookcase around the Italian millefiori lamp! (Do you spy Foxy Love, Rose?) The Halloween school house gets replaced with Santa's Workshop this time of year, but Alice's Tea Party remains 365.

Some of you might also remember the ceiling lamp from a past post, but it's been awhile and I thought it deserved a second look.

Crystal glass reproduction door knobs on French doors 
from Rousso's Reproductions via Amazon.com

The hallway and front entry from the living room (dining room's on the left).
I hate that floor runner. 

Hallway ceiling color: Sherwin Williams "Divine White" SW-6105
Front Door: "Connected Grey" SW-6165

Looking down the hallway from the front entry into the living area.
The short little door on the left leads to the crawl space.

Floors: White oak with custom 1:1 mix of Minwax "Special Walnut" and "English Chestnut" stain with two coats of satin polyurethane

Looking into the hallway from the dining room.

The cute quilted Santas wallhanging was made by our own AdventureJo! :-)

The door leads to the little powder room, tucked under the stairs. 
The goose print on the wall is "Dinner Call" by Dawna Barton, mounted on wood
one of our several art finds from AllPosters.com.

The powder room is so small, it's nearly impossible to photograph. This is my attempt to capture the pedestal sink and one of the hardwood HVAC vents (I think those are cool!), without capturing myself in the mirror! :-)

That grey gadget at the base of the pedestal sink is a Watchdog Water Alarm.
Having suffered several water leaks at our old house, we have them throughout this one wherever a leak might occur. Could save a lot of grief and expense.

Wall & Ceiling color: Sherwin Williams "Misty" SW-6232

Looking into the dining room from the living room.

The pub table, bought for our tiny dining area in Dragonfly Cottage, is supposed to go in our kitchen's breakfast nook. But lacking a dining room set, at least for now, our pub table is having to fill in. Sure makes the dining room look big! :-)

Dining room wall color: Sherwin Williams "Grassland" SW-6163
Ceiling color: "Svelte Sage" SW-6164

Took this one without a flash. It's not great, but I like the warm, cozy glow of it!

We had a hard time deciding what to put on the dining room wall. We really couldn't afford another framed art print, especially one large enough. We looked at metal wall art, but didn't find anything that fit our taste or Craftsman style home. Then we looked at tapestries and found this one. We like the warmth and texture it provides, and it was more affordable than framed art.


The oak lawyers bookcase belonged to my grandfather (who was a surveyor, not a lawyer; hope the ABA doesn't find out he had one of their bookcases, lol), and is still home to my rocking horse collection. :-) The cardinal picture on the post to its right is a quilted postcard, again made by my very talented friend "AdventureJo". (Click here for a closeup!) And the antique radio to its right, which still has all its vintage vacuum tube guts but doesn't work, I bought in 1986 for $30 from a roadside antique stand in New Mexico for my little TV to sit on. Now it displays Texas Bluebonnets from our wedding (we got married in Abilene, TX).

Wall color: Sherwin Williams "Kilim Beige" SW-6106
Ceiling color: "Divine White" SW-6105

The Kilim Beige walls in these living room photos have a greenish cast to them (on my monitor) that is not how that color actually looks. The color is much closer to the color of the Travertine tile around the gas fireplace, only lighter.

We added the two little windows to the floor plan, and are so glad we did. And we LOVE our gas fireplace! The tile surround is travertine (at BW's insistence!) 
We had the alcove above the mantel wired for the television, but then decided we like our TV just fine on the media cabinet to the left, so hung a picture there instead. The next people can put their TV up there if they want to!

I thought it would be fun to include a closer view of my snowmen collection, though I miss my bay window where I could display them all with my birdhouses like a Christmas snowman village. (The little snowman holding the fox that's featured in my current holiday header is third from the right). :-) You can also barely see the very wee row of blocks, spelling out "NOEL," that I tucked into the mantel trim on the righthand fireplace column (beneath the tall Santa, which is made from a fencepost!) It fits there perfectly! I wasn't very satisfied with how our mantel was decorated. Next year, I'm thinking a garland draped across the front, along with our stockings. would be nice.
We ordered the picture above the mantel from AllPosters, figuring it was a perfect size, would go well with our wall color and coordinate nicely with the colors in the adjacent dining room, and because we liked it. I didn't realize how much I liked it till later when I was sifting through some of the images I've saved in my Photobucket account over the years and found this one! It was one of the first ones I ever saved there several years ago. I hadn't recognized it when we found it at AllPosters, but I guess when you really like something, you really like it! :-)

(We bought the art print, matted and framed, which is no longer available. So this link takes you to the unframed stretched canvas product at AllPosters)

Coming up: Part 2: The Kitchen :-)

Monday, December 24, 2012

A Treat & a Tree for Christmas Eve :-)

Merry Christmas Eve!

I've been struggling with a cold, some technical difficulties with our computer (and with a new gizmo, which I'll divulge in a later post), and with far too many other distractions lately to get my act together in time to do the Christmas posts I'd planned. 

But I didn't want to go all Ebenezer on you either, so here is a treat I've been wanting to share since we discovered it a couple of weeks ago...


Delicious and filled with flu-fighting, immune-boosting goodies that are packed with vitamins (especially C), important minerals (like potassium), and other anti-oxidant, anti-inflammatory and anti-bacterial properties, this festive Ginger Cinnamon Fruit Salad is not only ideal for flu season, it's even perfectly colored for the holiday season with its green pears and bright red apples and pomegranate seeds!

Speaking of which, we had no clue how to de-seed a pomegranate, so we found a couple of helpful videos and this is the technique we use. His warning that pomegranate juice stains mercilessly is not to be taken lightly! 

I follow the recipe, though I don't hesitate to add a second pomegranate if we've got one, and I sometimes use an orange-mango juice blend. Yum!


I also wanted to share our new Christmas tree with you, but have to say I'm far more satisfied with our tree than with my photos of it. But I'll forge ahead anyway...

Our old artificial tree was nearly 25 years old (I'd bought it in Kennebunkport on sale after Christmas before I ever met BW!), had been through many moves, was showing its age, and I'd stopped bothering to decorate it for Christmas a few years ago. So we gave it away during our downsizing project before our house sale, and last year in our little rental cottage we just used the 3' tree I've had since I was about seven, which you can see in the background in the first photo above. (I get a lot of mileage out of my fake trees!)


But I missed my collection of tree ornaments and having a full-size tree to enjoy, and figured a new house (especially one with 9' ceilings) deserved a new Christmas tree. So we got this 7 1/2' tall one from Home Depot, pre-festooned with little white lights. We didn't have a good spot in the living area for it (not without moving furniture out) and since the only large downstairs window that faces the street is in the study, we chose that room for our tree and so got one with a fairly narrow base. I've usually found artificial trees to be too full and bunchy for both my taste and decorating style, and while this one is better than most, it still doesn't compare to the Christmas trees of my childhood. But then, the bar was set awfully high...


We always had real trees when I was growing up, and if we were living close enough, we'd cut our own from my grandparents' 200-acre farm in the Maine woods. They were always balsam fir, a wonderfully aromatic tree with lots of space between the branches. This suited my mother perfectly, because she hung most of her ornaments with pretty ribbons (as her mother had done, and as I do too), and would also drape it in tons of silver tinsel ~ applied one strand at a time. I never had the patience, and as soon as she caught me putting it on five or six strands at a time, I lost my tree-decorating privileges! :-) But her technique worked magic, because our tree would shimmer beautifully in the light, as if covered in ice crystals. 

My dad always had a knack for selecting a perfect tree, but even that was never quite good enough for either of them. So Dad always cut a few extra branches from other balsam firs along with the ones he trimmed from the tree base, and if an area on our tree was too sparse he'd drill a hole in the trunk and glue the extra branch into it. If some branches drooped too much, he hoisted them with invisible thread. And he always took great care in feeding and watering the tree so it stayed fresh until my birthday in early January (I would not permit the decorations to come down until the next day!) And then after all that tinsel, the ornaments and lights were off it, Mom and I would strip many of the needles and clip most of the aromatic tips from the branches, and Mom would spend most of January making wonderful balsam-filled pillows and sachets. They'd last for years - one crush and it smelled like Christmas all over again.

So although I think our tree turned out quite pretty, it does not compare with the amazing trees of my youth. Someday, maybe, we'll be able to get ourselves a real fir balsam and I'll make a zen-like attempt at draping it in tinsel. But for now, here's our tinsel-less fabulous fake...
Plus a bonus sneak-peek at part of the study, to reassure some of you that I have indeed been taking photos of the inside of our house, which I hope to post by New Year's!)

Though my camera and I tend to struggle with low-light situations, I played around with a few photos and got a couple I was pleased with (the one on my current Christmas header is one of them)...

Here are a few of my favorite ornaments (at least the ones whose photos turned out pretty well!)...
A partridge with her pear :-)

I liked this artsy shot, taken through the branches

For our British friends! :-)
We bought this one at Harrod's on our first trip to England in 1996.
(On our next trip to the UK two years later, we bought a Scottish thistle ornament. 
I think ornaments make wonderful travel keepsakes!)

This little glass bear is an antique that belonged to my grandmother and probably dates from the 1930s when Mom was little. It's made to fit a tree light, but today's mini lights are too small and regular sized lights are too big! I made do, but I always have to find a branch for him to sit on, along with a handy bulb above him to stick down in his head!


Here's hoping that yule have yourself a merry little Christmas!
May it shimmer and sparkle like the prettiest tree. :-)

Saturday, October 6, 2012

Our Flaky Friday


Friday was indeed flaky in a lot of ways, including meteorologically. It was cold and cloudy all morning and I had a wretched migraine, so I was pretty out of it. But when I went to the door to let BW in around 4pm (he'd stopped by during his afternoon break to change into dry socks and long johns), I saw this out our front door...


And this out our back door...


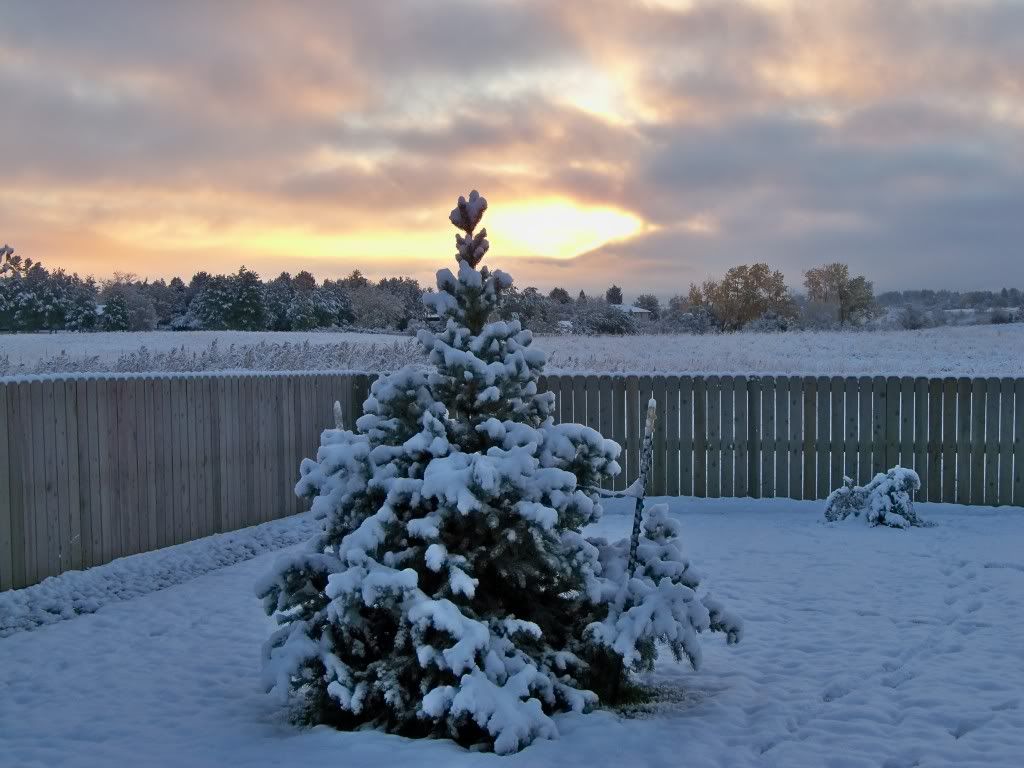
And I thought, well at least it's not sticking. Much. Then after it got dark I started hearing loud booms, which turned out to be cannons they fire when Sheridan High School's football team scores a touchdown. It sounded like we were under a heavy artillery barrage, so I watched a little of the game online and that's when I saw how hard and fast the snow was coming down and how much it was accumulating. In what's been dubbed "The Snow Bowl," Sheridan won their Homecoming game 49-6 (that was a lot of cannon fire!) And this is what we woke up to this morning...

A snow-covered spruce. Can Christmas be far away?
Our poor little Spirea appears to have fainted!

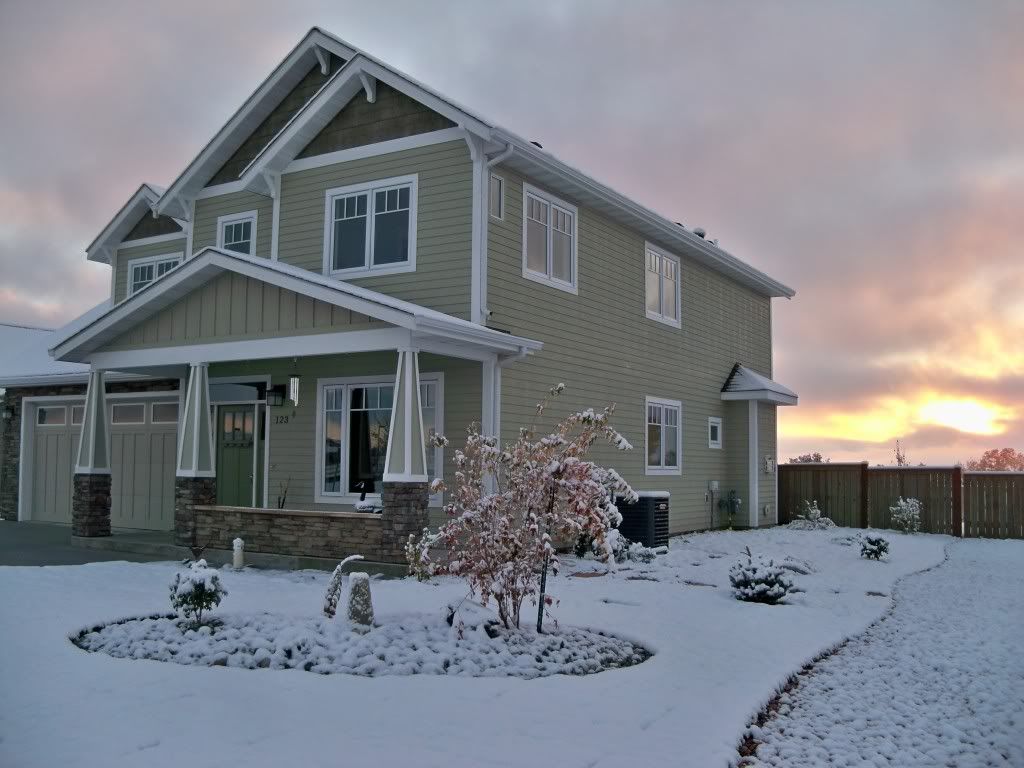
Our new house and appalled plants

One of our delightful neighbors on his morning walk

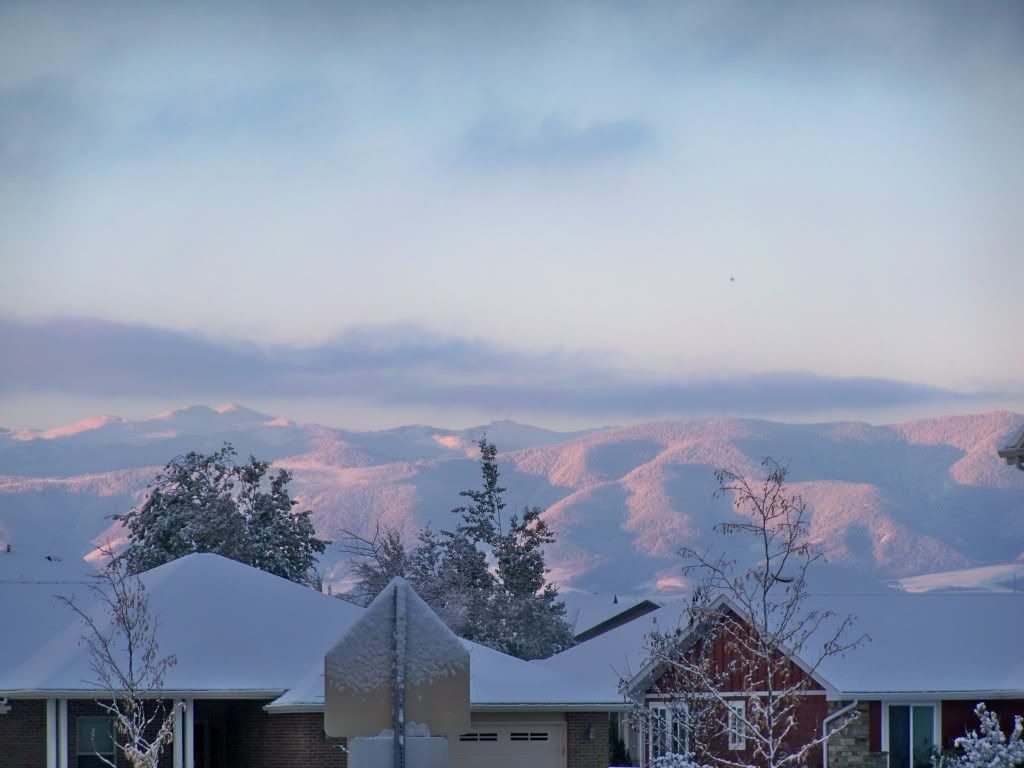
Our view of the sunrise-tinted, snow-clad mountains

LinkWithin

Related Posts Plugin for WordPress, Blogger...

SOME CURRENT & RECENT READING...

SOME CURRENT & RECENT READING...

  • THE HUMANE GARDENER ~ Nancy Lawson
  • THE WORLD WITHOUT US ~ Alan Weisman

There is still strong in our society the belief
that animals and the natural world have value
only insofar as they can be converted into revenue.
That nature is a commodity.
And that the American dream is one of unlimited consumption.
There are many of us, on the other hand,
who believe that animals and the natural world
have value by virtue of being alive.
That Nature is a community to which we belong
and to which we owe our lives.
And that the deeper American dream is one of unlimited compassion.

~John Robbins, "The Food Revolution"

free counters