When the pumpkins appear in my neck of the woods, it's time for quilts! And this year's 16th annual October Fiber Arts exhibit at our public library was special, since my friend (and quilter extraordinaire) Jo got to attend it with me during her visit earlier this month! That was fun for us both, as I got the benefit of her insights and expertise while viewing the quilts, and she got to see them up close and in person instead of having to press her nose to her computer screen in Michigan to try to study some of the quilt details. :-)
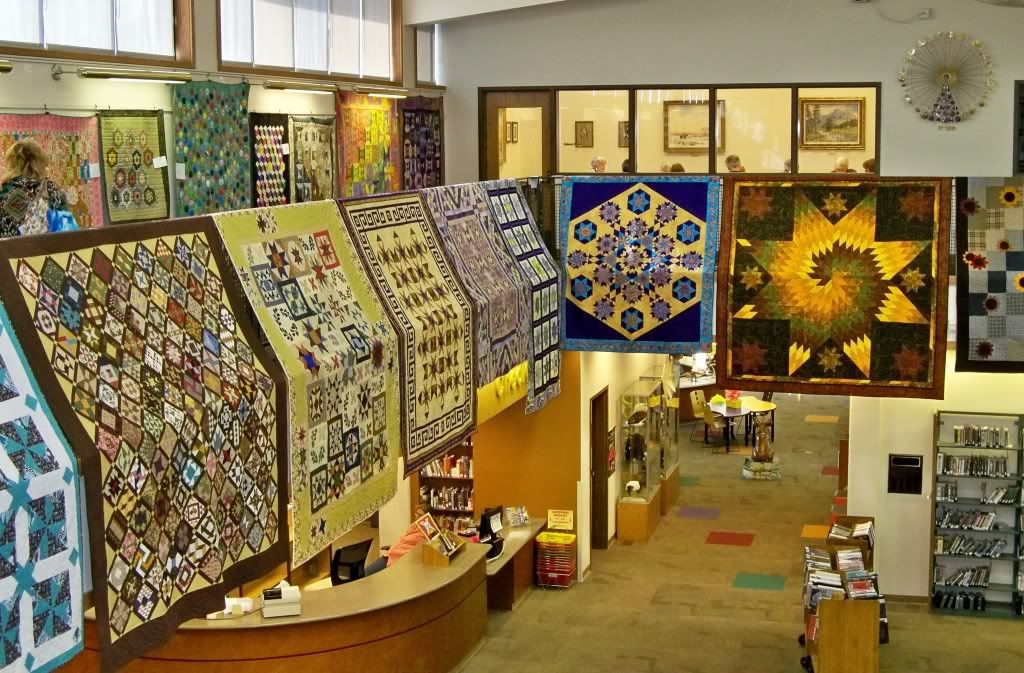
Unfortunately, though there were many beautiful exhibits, we didn't think they were shown to their best effect because of how they were displayed. In past shows, the quilts were usually hung unfolded from the mezzanine railing from as close to their top edge as possible to make nearly the entire quilt visible from below or from across the mezzanine. This time many of them were folded over width-wise before being draped halfway over the railing, so that in many cases just 1/4 of the quilt was visible from any particular vantage point. To show you what I mean, here's an overview photo from a past year's show...
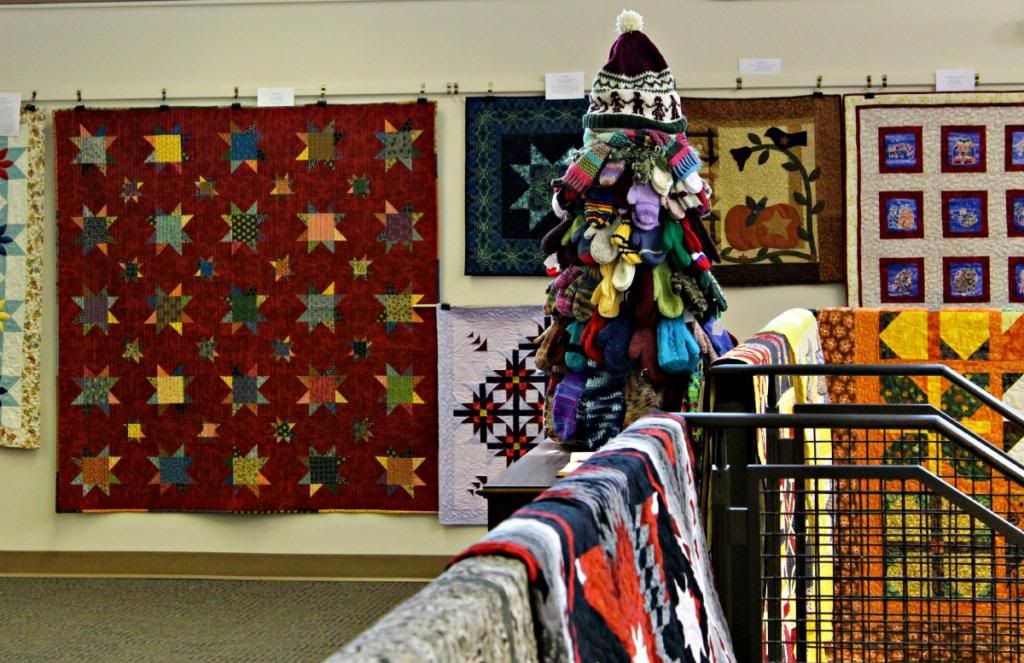
and here are this year's overview photos...


In some cases you could still see enough of the quilt to get a good idea of its pattern and design, but in several cases hiding that much of the quilt made a big difference. I think were a lot more quilts in this year's show - which was great - but they also looked crammed together (often overlapping) with no thought to color or design placement, so some of the colors or designs clashed with each other. I don't know why they didn't use the stair railing to display some of them like they have in years past, and I wouldn't have wanted to be the person who labored on a quilt for months only to have it folded up and scrunched in a corner. And most annoying of all, several of them were hung very crookedly. I had Jo straighten out one of our favorites as much as she could before I photographed her with it, ignoring the "don't touch" signs because it was listing so badly! Anyway, I was disappointed since they've always been displayed so beautifully in the past, and I wanted Jo to enjoy our quilt show at its best! But we still had fun. I mean, just look at all those colors and patterns! So yummy!...

I'll start with the above section, since I took closeups of four of the five quilts displayed on the wall (and you'll see more of that red and purple eye-catcher on the railing in Part 3!) As always, I've included, in quotes and italics, the exhibitor's personal note from the quilt's info card whenever I thought it was interesting or informative. And also as always, click on any photo for more detail. And enjoy! :-)
I thought this quilt was quite elegant...
Magical Medallions
Technique: Needleturn Quilting, Appliqué
Artist: Judy Peck
"Begun January 2012, completed November 2012"
And this one was cheerful and summery...
Jane's Flower Garden
Technique: Machine Appliqué
Artist: Jane Rader
Quilter: Janis Farr
"Patterns for the appliqué came from the Kansas City Star in the 1930's.
The fabrics are all 1930's reproductions."
I'm always a sucker for dark backgrounds and bright colors, so you know I loved this one...
Garden Nouveau
Technique: Needleturn Appliqué
Artist: Judy Peck
"Begun August 2012, completed Februrary 2013"
It's a shame they hung this next beauty behind one of the display cases; Jo and I both admired it and I'd have loved to have captured it in its luscious entirety...
Aunt Grace's Circle of Friends
Technique: Machine Pieces, Hand Appliqué, English Paper Piecing
Artist: Maureen Humphrys
Quilter: Virginia Ohr
Jo and I also were really drawn to the reddish one to the left of the mitten tree...
Its background color was quite unusual - a sort of rich, rusty burgundy - but it gave us both fits trying to capture it accurately with our cameras! No matter how many lighting or angle permutations we tried, it kept turning out too light, too orange, or too red. This was my most accurate attempt in a closeup, which still turned out too light and orangey-red, but which I wanted to include so you could see the details. Because the quilting technique - just vertical lines - was also pretty unusual, and the combination of the quilting and the color made it look like warm, cozy corduroy...
Falling Stars
Technique: Machine Piecing
Artist & Quilter: Susan Baggett
These next three quilts were made by three quilting friends named Jamie, Marcia, and Mary Jane ("JMMJ"). One of them picks a fairly simple pattern and challenges the other two to do it too. Here is the result of their latest "MJJM Quilt Challenge" trio...
L-R: Jamie Leupold's quilt, Mary Jane Collins' quilt, Marcia Suranyi's quilt
I thought they were all lovely and fun, but my favorite was Jamie's, I think because of the unusual colors and the fact it made me feel like I was looking out through the port holes on a ship, embarking on some grand adventure...
JMMJ Quilt Challenge
Technique: Machine Pieced/Raw Edge Appliqué
Artist: Jamie Leupold
Quilter: Becky Stednitz
Imperial Diamonds
Technique: Pieced
Artist: Peggy Gable
Quilter: Becky Stednitz
"I make each grandchild a special quilt for his or her 21st birthday.
This one lives in Texas."
The quilt on the right, though not the main one I was photographing, deserves a mention too, especially since it's a quilt pattern that Joanne has also made!...
Tree's Up, Lights On
Technique: Machine Pieced
Artist & Quilter: Jennifer Golden
Another that appealed to my love of bright colors and whimsy...
Irish-Chained Pin Wheels
Technique: Machine Pieced & Quilted
Artist: Pamela Rapp
Quilter: Virginia Ohr
"Part of a Friendship Block Exhange"
And since tomorrow is Halloween (my favorite holiday!), I'll end this post with this delightfully festive pumpkin quilt!...
Primitive Pumpkins
Technique: Machine Pieced
Artist: Margaret Prout
Quilter: Becky Stednitz
In Part 2 I'll share some favorite non-quilt fiber art pieces from the show, and then will wrap up with Jo and my VERY favorite quilts in the show (and some post-show quilt goodies) in Part 3. But for now, click on the quilt-patterned pumpkin picture at the top of this post for DIY instructions on decoupaging your own if you'd like, and enjoy a happy (and bewitchingly healthy) Halloween! :-)